
Gaining remote control over your surveillance system can transform the way you monitor and manage security across your property. Whether you’re dealing with a DVR or NVR setup, knowing how to access your system through a web browser opens the door to smarter, more efficient monitoring. With just a few steps, you can check live feeds, review recorded footage, or configure settings—all without being physically present.
To access your security camera DVR/NVR via a web browser, first connect the device to your network. Then, enter its IP address in the browser’s address bar. Log in with your credentials, ensuring network settings like DNS and firewall allow access. This enables smarter surveillance monitoring remotely on your PC or Mac without installer hassles.
In this blog, you’ll learn how to securely access your NVR or DVR using a web browser, including setup tips, browser compatibility, and common troubleshooting solutions. Whether you’re new to smart surveillance or refining your current system, this guide will walk you through everything you need to streamline your access and boost your monitoring capabilities.
How to Access Your DVR or NVR via Web Browser for Real-Time Surveillance
Step 1: Prepare Your System for Web Access
To begin, ensure that your DVR or NVR is connected to your home network either through LAN or Wi-Fi. Confirm that all devices in your security camera system—including the camera systems and recorders—are properly powered and online. It’s essential to configure your DVR or NVR to allow browser-based access, including setting up network parameters like a static IP or using DDNS for dynamic addressing.
Before accessing the system, check your browser before proceeding. While modern platforms such as Chrome, Firefox, or Edge browser offer better compatibility, some legacy systems may still require Internet Explorer. Always use updated versions of multiple web browsers for best results.
Step 2: Find and Enter the IP Address
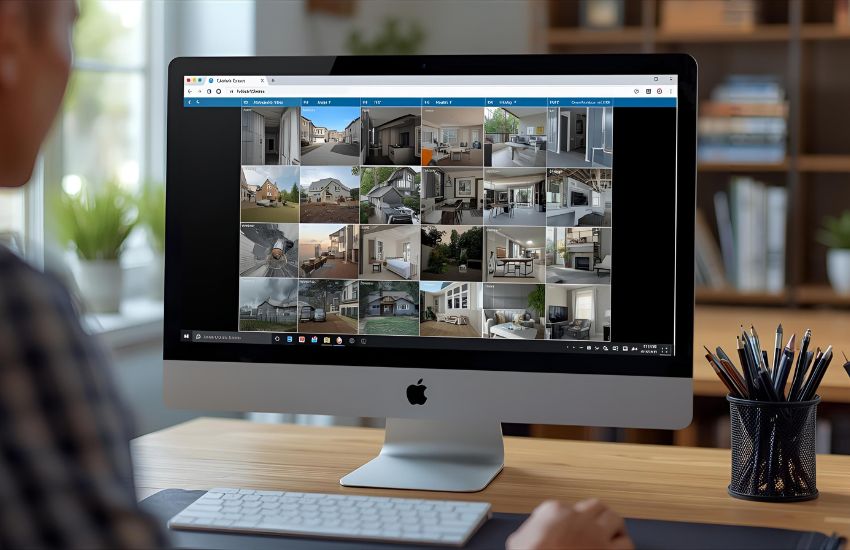
Locate the NVR’s IP address or the IP address of the NVR from your router’s connected device list or through your recorder’s settings menu. Once identified, enter it into your browser’s address bar. This step directs you to the NVR web browser interface, which acts as your gateway to the full system GUI.
Step 3: Log In to the Web Interface
Upon reaching the web interface, you’ll be prompted to enter a username and password. These credentials allow secure entry to the DVR or NVR. If this is your first time accessing the system, default login information may be provided in the user manual, but it’s highly recommended to update these credentials immediately to ensure system security.
Step 4: Monitor and Manage Cameras
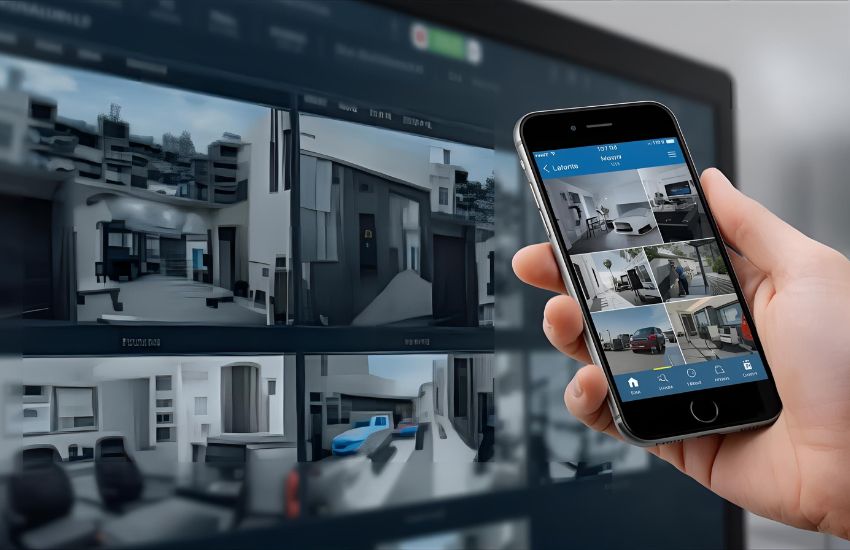
Once inside the web platform, you’ll have full web browser view access to your surveillance systems. From here, you can monitor real-time feeds, adjust camera settings, and review playback recordings. This level of access mimics the functionality of traditional video management software, enabling you to manage camera systems directly from any PC.
Step 5: Optimize Your Remote Access Experience
For offsite monitoring, remote access is achievable by configuring port forwarding on your router. This allows your DVR or NVR to be accessed via a web browser from outside your LAN. Secure access can be further enhanced by integrating your system with video management software or using platforms like IP Cam Talk for community advice and compatibility solutions.
Whether you’re managing a simple security camera system or a complex network of surveillance systems, knowing how to navigate your DVR or NVR through a browser puts control in your hands—securely, efficiently, and in real time.
See more about…Security DVR
Ensuring Compatibility and Playback on Multiple Web Browsers Through Port Forwarding
Understanding Compatibility Across Web Browsers
When accessing your DVRs and NVRs remotely, browser compatibility becomes a critical factor. While modern platforms like Mozilla Firefox, Chrome, and Edge offer wider support, not all surveillance systems behave uniformly across them. Some network video recorder systems may require you to please enable JavaScript or install plug-ins for full functionality. It’s important to test your system on multiple web browsers to ensure smooth operation, especially when reviewing footage or managing settings remotely.
The Role of Port Forwarding in Browser Access
To view your security system outside your LAN, you must set up port forwarding on your router. This process allows your DVR or NVR to be reachable over the internet by directing external traffic to a designated port number on your local device. Whether you’re using a static IP address or a different IP through a dynamic DNS service, correct port settings ensure uninterrupted connection to your live feed and playback functionality.
Configuring Port Forwarding for Smooth Playback
Start by identifying the HTTP port and media ports assigned to your recorder. Access your router’s interface, typically by entering its URL in a web browser, and proceed to configure port forwarding on your network. Accurate forwarding on your network router routes incoming connections directly to your device within the LAN, enabling secure and direct web access.
Achieving Cross-Platform Accessibility
For optimal results, ensure your system supports a broad range of browsers and platforms. This includes desktop browsers as well as mobile apps designed to complement your remote monitoring setup. Confirm that your system’s firmware supports full functionality across different interfaces to guarantee broad compatibility with varying user environments.
By prioritizing browser compatibility and correctly configuring port forwarding, you ensure your system is not only accessible from anywhere, but also functional across diverse platforms. This dual approach enhances real-time monitoring and playback efficiency—no matter what browser or device you use.
See more about…Security DVR NVR Backup
Conclusion
In conclusion, gaining reliable browser access to your DVR or NVR requires more than just a basic setup—it demands precise configuration of network settings, careful attention to browser compatibility, and secure connection via port forwarding. Whether you’re operating from a PC or Mac, ensuring seamless access across platforms enhances your ability to monitor, manage, and playback footage from anywhere.
It’s also crucial to verify your system’s browser environment. If JavaScript is disabled, you may encounter functionality issues, especially during live viewing or when adjusting settings. In such cases, an additional installer or plugin may be necessary to restore full functionality. Similarly, make sure your firewall isn’t blocking essential ports and that your DNS settings are properly configured to avoid connection failures when accessing your device remotely.
By optimizing every step—from port forwarding to browser selection—you can confidently access your surveillance network via secure and efficient channels. This not only improves the reliability of your system but ensures that real-time monitoring remains smooth and uninterrupted across all platforms.
See more about…Swann DVR Camera Compatibility
Frequently Asked Questions (How to Access Your Security Camera DVR / NVR Web Browser for Smarter Surveillance Monitoring)
How to access NVR from browser?
To access an NVR from a browser, connect your NVR to the network and note its IP address. Open a compatible browser, type the IP address in the address bar, and log in with your credentials. Ensure plugins or ActiveX controls (if required) are installed. Proper port forwarding may be needed for remote access.
How do I view my DVR on my browser?
To view your DVR on a browser, connect your DVR to the network and note its IP address. Enter this IP in your browser’s address bar. Install any required plugins or software prompted by the DVR interface. Log in using your username and password to access live video, playback, and settings directly from the browser.
How do I access my CCTV camera from my browser?
To access your CCTV camera from a browser, connect the DVR/NVR or IP camera to your network. Find its IP address using the device menu or router settings. Enter the IP in your browser and log in with the camera’s username and password. Some systems require installing browser plugins or enabling specific ports for remote access.
How to view NVR online?
To view your NVR online, connect it to the internet via a router and enable remote access in its settings. Note the NVR’s IP address or use its cloud P2P service. Open a web browser, enter the IP/domain, and log in with credentials. You can also use the manufacturer’s mobile or desktop app for remote viewing.